7 Stunning DIY Hairdos for Bride and Bridesmaids Alike
Your wedding day is drawing nearer and as you continue to plan for all of the different things you’ll need—wedding cake, gown, flowers, jewelry, shoes—don’t forget to plan how you’ll style your hair. It’s your big day, and while you want to look as stunning as possible, you also want to be the best version of you. And the best way to look like you is to style your own hair and that of your bridesmaids. So we’ve collected 7 gorgeous DIY hairstyles perfect for you to practice with and then create for each other on your wedding day.
Choosing the perfect hairstyle can feel overwhelming because how you wear your hair really can make or break your entire look. Fortunately, the days of stiff, formal hair that looks glued in place are long gone. Today’s bride wants to look easy-breezy, even in the most formal gown. Therefore, while it’s easier to create a look that’s truly you without having to use all that goop and glue, you’ll still want to put a little more thought into your wedding day hairdo.
A good rule of thumb is to base your wedding hairstyle on your gown. If it’s formal and traditional, you’ll want your hair to be a bit more formal as well. You also want your wedding hairdo to complement the shape of your face and work well with your natural hair.
All of the styles we’ve chosen here are based on natural hair, so just experiment until you find the one that works best for you.
1. The Pixie
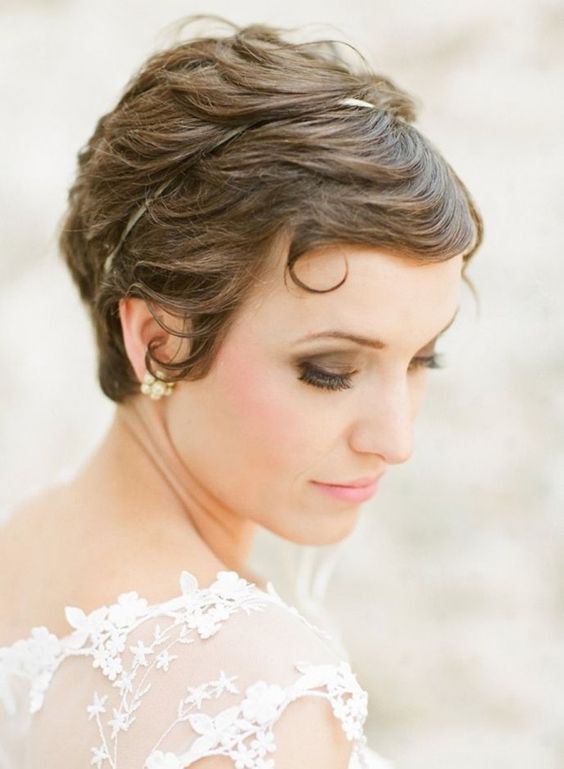
If you prefer a simpler look for you and your bridesmaids, especially if you have short hair, you can do The Pixie hairstyle. Just grab a little pomade, rub it between your palms, and begin applying it to the roots in the opposite direction of where you want your hair to go. This will give you volume and lift. Then once it’s dry, just finger comb or curl and finish with a headband or hair ornament.
Note: The Pixie works best with a good professional haircut, so since you’ll be saving on a professional stylist for your wedding day, splurge on a designer cut beforehand!
2. Goddess Braid
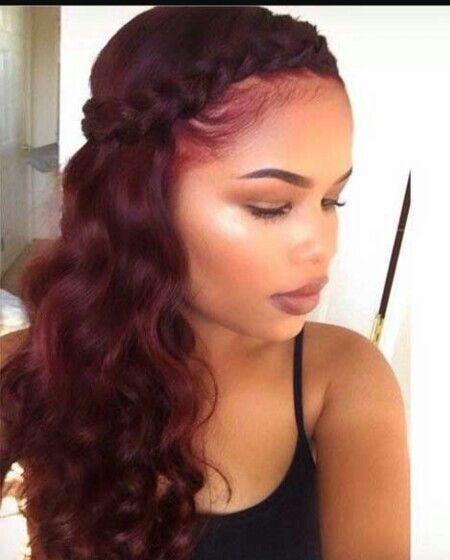
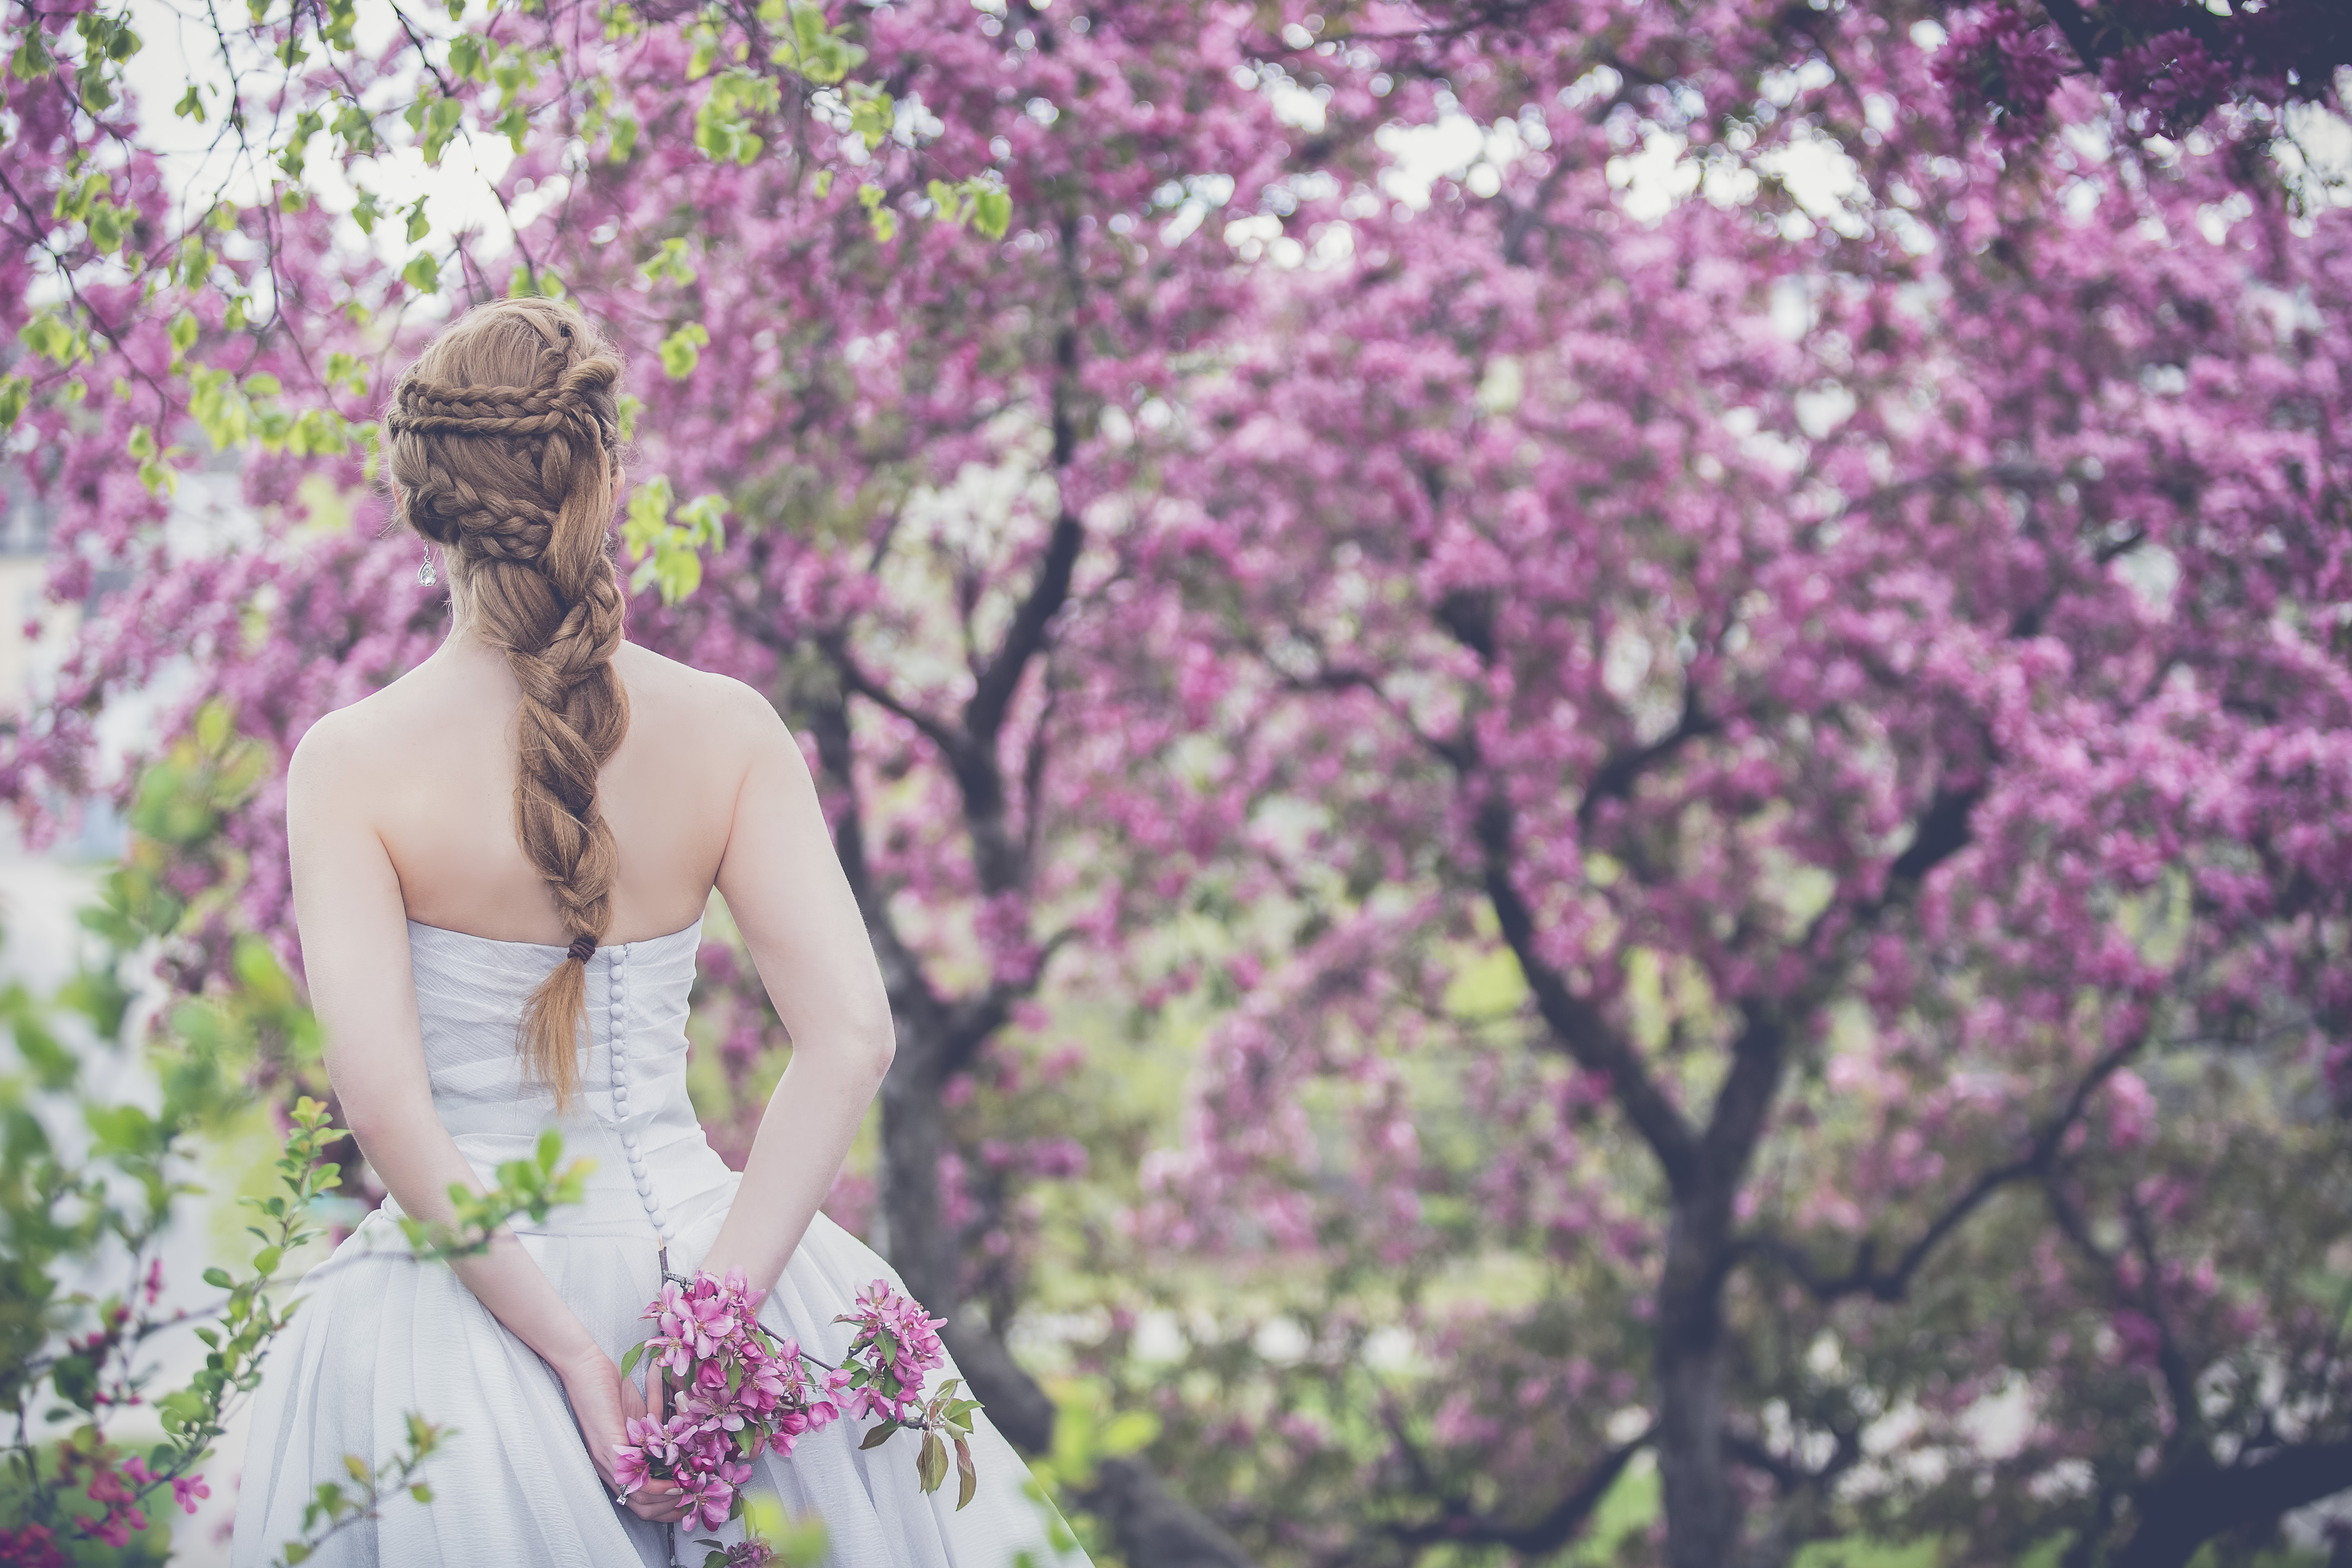
If you have thick hair of any length, the Goddess Braid is a beautiful style. Start by backcombing the top for a bit for fullness. Then begin French braiding from one side and wrap around to the other side. Finish the ends in a regular braid then cross and pin both braids in the back. You can now accessorize with flowers, a lightweight comb, or a few pretty hair pins.
For extra glamour, you can tuck the ends of your loose hair up and around the braid, or in a low bun, or even a side ponytail.
3. Sideways French Twist
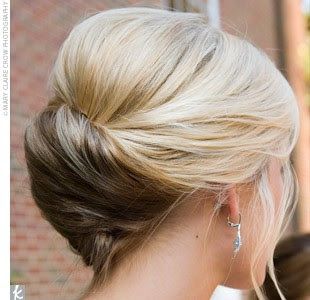
For a gorgeous formal look, try this twist on the French twist! Start by teasing a bit of volume into the crown, then finger comb the front sections to the back. Roll and pin each side of your hair in the same direction but finish pinning a bit off-center. Add a few fresh flowers for an informal touch or a jeweled comb for a formal look.
4. Princess Braid
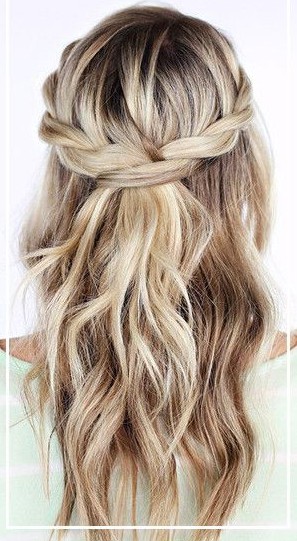
If you want a very natural hairstyle, consider the Princess Braid. This is a variation on the Goddess braid but is looser and more girlish. Start as you would if you were doing a Goddess braid but loosely twist the hair sections rather than braiding. Secure both twists together at the back using more bobby pins, and then add flowers, a comb or decorative hairpins to camouflage the bobby pins. The more formal the hair ornament, the more formal the look.
5. French Braid Messy Bun
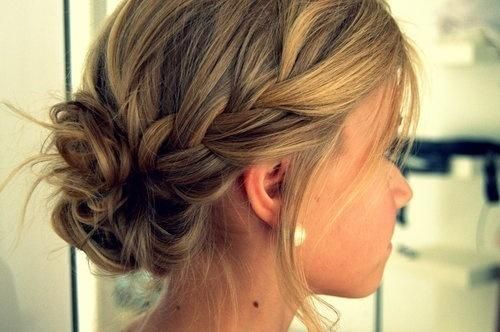
This is for those who are looking for a simple yet elegant look that can be more formal or more casual depending on how many strands of hair you leave loose. Start by parting your hair on one side and then begin French braiding from the front to the back and secure it using a bobby pin. Repeat the same process on the opposite side of your hair. Then tease the loose hair and either roll or wrap it up off the nape of your neck. Secure with pins, clips or combs.
Keep the ends tidy for a formal look or pull out more strands for a casual feel. Add a decorative hair ornament or flowers to complete the look.
6. The Waterfall Braid
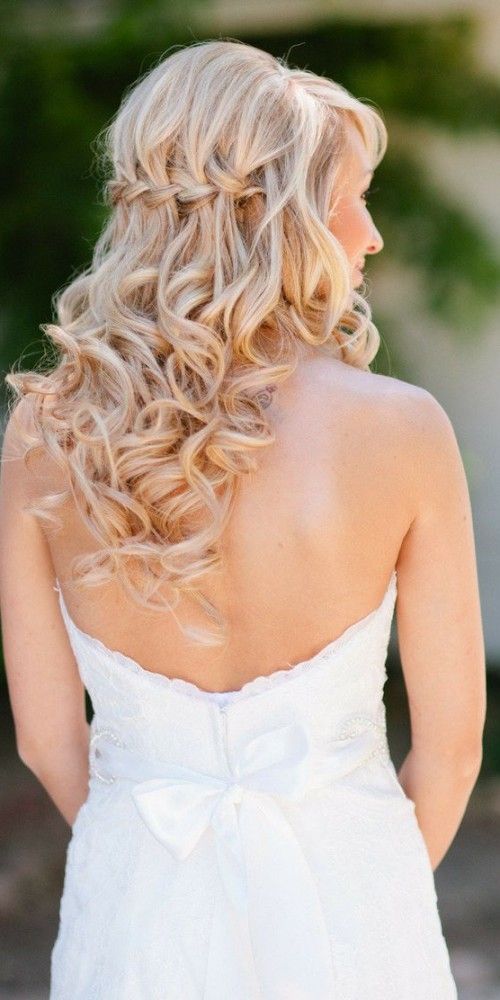
This hairstyle is classic, very much in fashion, and is actually much simpler than it looks! The trick is to braid, but “drop” one strand of hair then pick up another, trapping vertical strands in between the braid effect. This style works particularly well if you backcomb the crown.
Check out this “Now I Get It” Waterfall Braid Tutorial by The Beauty Thesis. http://thebeautythesis.com/2012/11/11/waterfall-braid-now-i-get-it-4/
7. French Milkmaid Braid
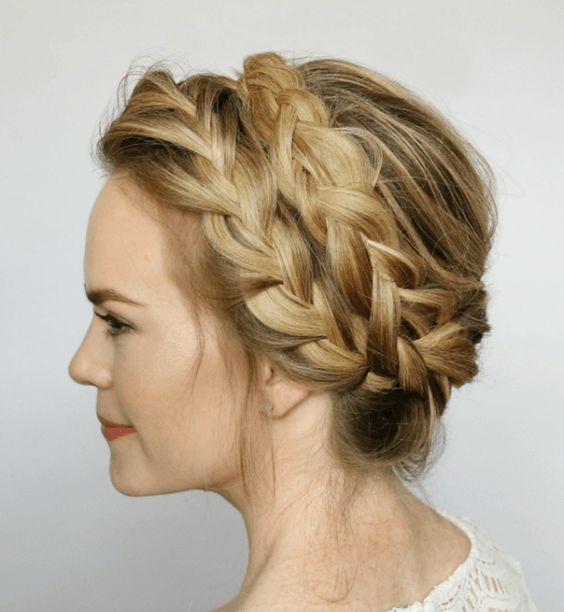
This is another look that can be made more formal by keeping it tidy and not pulling as many strands loose.
Use a tail comb to create 2 front sections of hair that will travel around your head from ear to ear. Use a clip to secure one-half of your hair, then begin on the other side by French braiding that section. As you continue braiding, you should add more hair on every strand as you go. Once you’ve reach the braid at your ear, finish the ends with a standard three-strand braid.
Then lift the braid up over your hair until the very end of the braid reaches the opposite ear. Extra strands of hair should be pinned back in the front or tousled forward. Secure any loose strands using a bobby pin, and you’re all done!
You can also curl the loose ends if you wish.
Here’s a fabulous tutorial for this look: http://missysue.com/2016/05/french-milkmaid-braids/
For More Tips: Our stylists have put together some guidelines we’re sure you’ll find helpful before deciding on the best DIY style. http://www.davincibridal.com/blog/your-wedding-hairdo-the-ultimate-guide-for-a-beautiful-you/
And for some ideas on which kind of wedding hair accessory to add to your beautiful DIY hairdo—veil, tiara, floral crown, and other lovely touches—check out this guide:
http://www.davincibridal.com/blog/wedding-day-hair-accessories-4-classic-looks-which-to-choose/



Recent Comments